Add your Embroidery Designs
Embroidery Designs Overview
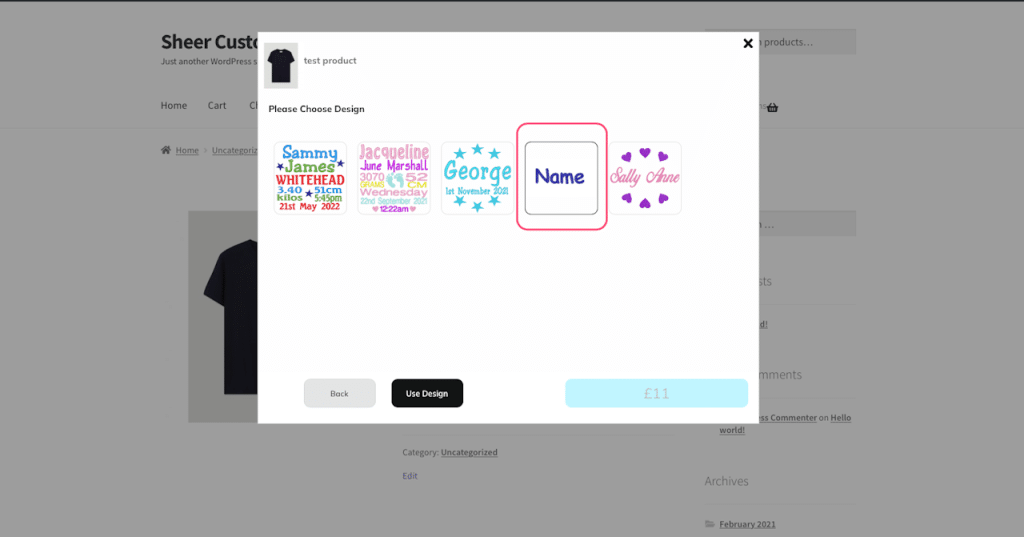
Embroidery Designs can comprise one or more EMB templates; they reside in Design Categories which are displayed as the first step in the front-end.
Embroidery Design Categories are totally separate from WooCommerce product categories.
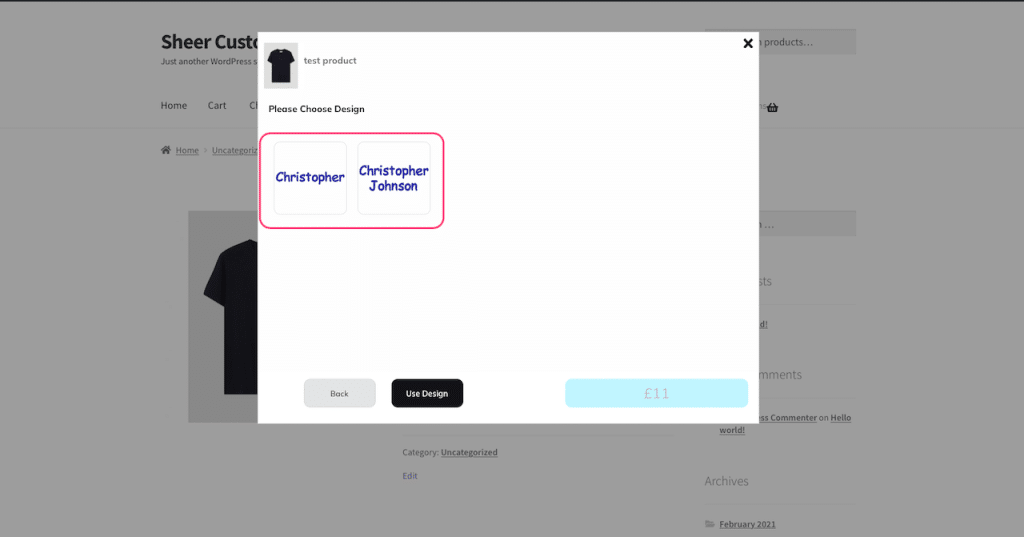
A typical example where you may want an embroidery design to comprise two EMB templates would be a Name. For example, you may want offer a single line first name option, and a two line option with first and second name.
The front-end handles Embroidery Design’s comprising multiple EMB templates by displaying an entry-point thumbnail for the Embroidery design (this can be anything you choose) which drills down to the EMB templates.
You can see an example of the front-end on the left where an embroidery design thumbnail drills down to two options: a single name and two names – each with their own thumbnail.
When an Embroidery Design comprises more than one EMB template the front-end auto-generates a thumbnail for drill-down (this can be overridden with your own custom thumbnail). If an Embroidery Design comprises a single template then no additional thumbnail is generated. Embroidery designs comprising single or multiple EMB templates can be mixed together in the same Embroidery Design Category.
Add Embroidery Design Categories
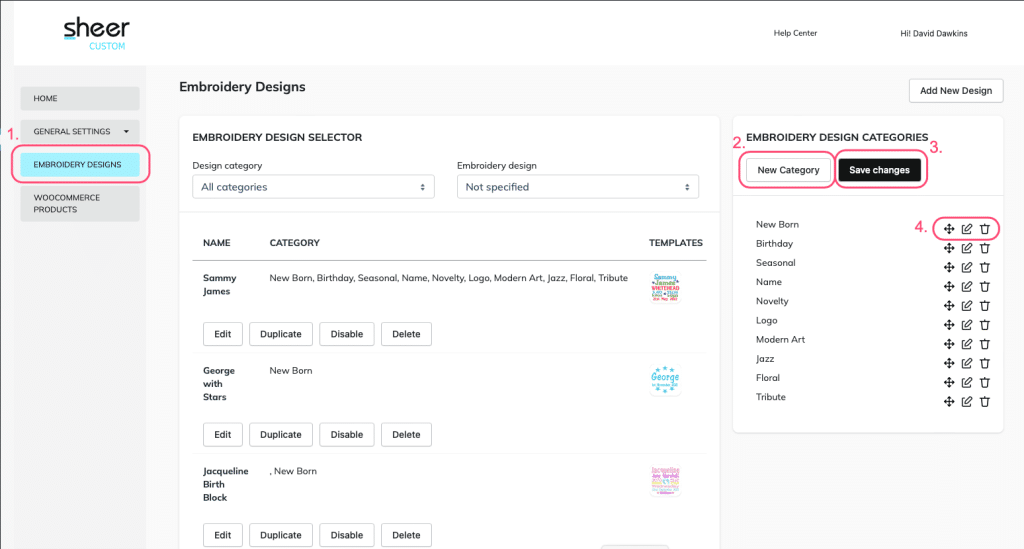
- From the side menu > Embroidery Designs
- Click “Add Category” > then enter your category name > choose a parent category if applicable (for design category drill-down in the front-end)
- Click “Save changes“
- Re-order (front-end display), edit or delete categories
Add New Embroidery Design
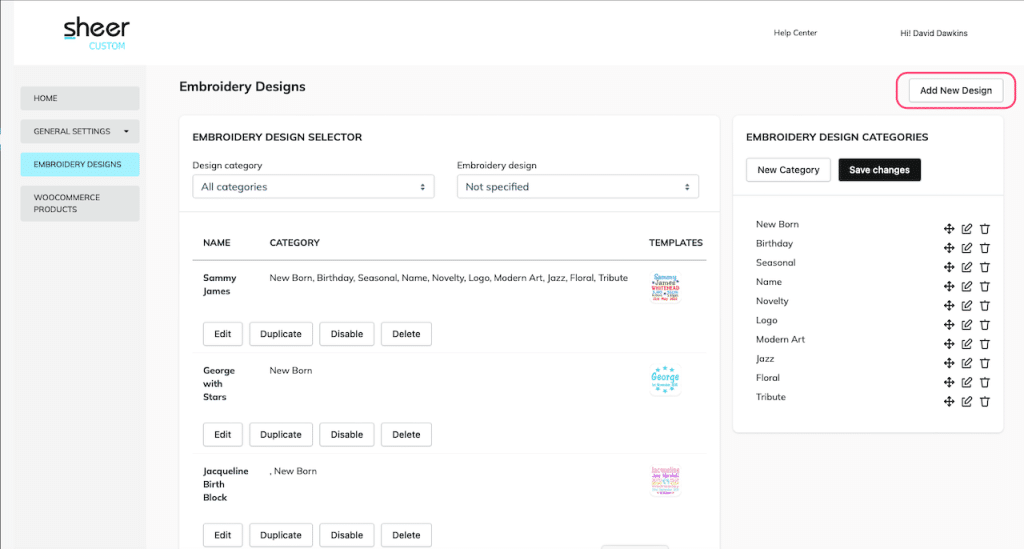
- Click “Add New Design“
- Give your Embroidery Design a Name
- Add a thumbnail if the design comprises multiple EMB’s (not necessary for a single EMB design)
- Add the Font’s and Threads you want to make available for the design
First, make sure you have added the fonts and threads used in the EMB in fonts and threads in General Settings
- Add the Design Categories you want the Design to belong to (this will determine where it displays in the front end)
First, make sure you have added the Design Categories you want as per the previous step
- Click “Add New Template” and select the EMB template you want to upload from your computer
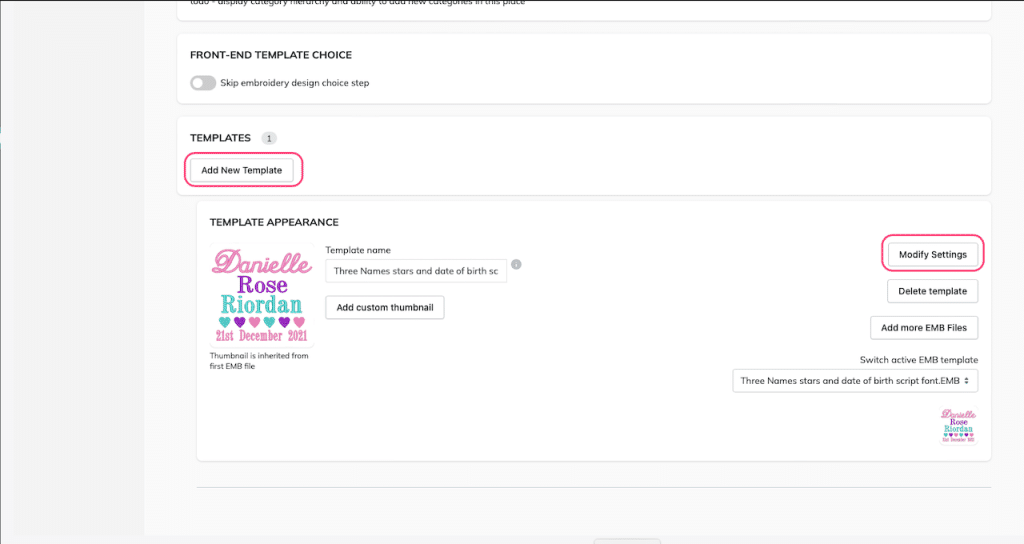
- Click “Modify Settings” > then modify the settings as required > then “Save Embroidery Design” (top of the page)
You can change the display order of the Lines on the front end by clicking the cross icon and dragging the Lines into your preferred order – this may be necessary if you created your Lettering Objects in Wilcom in a different order to how they appear in the design.
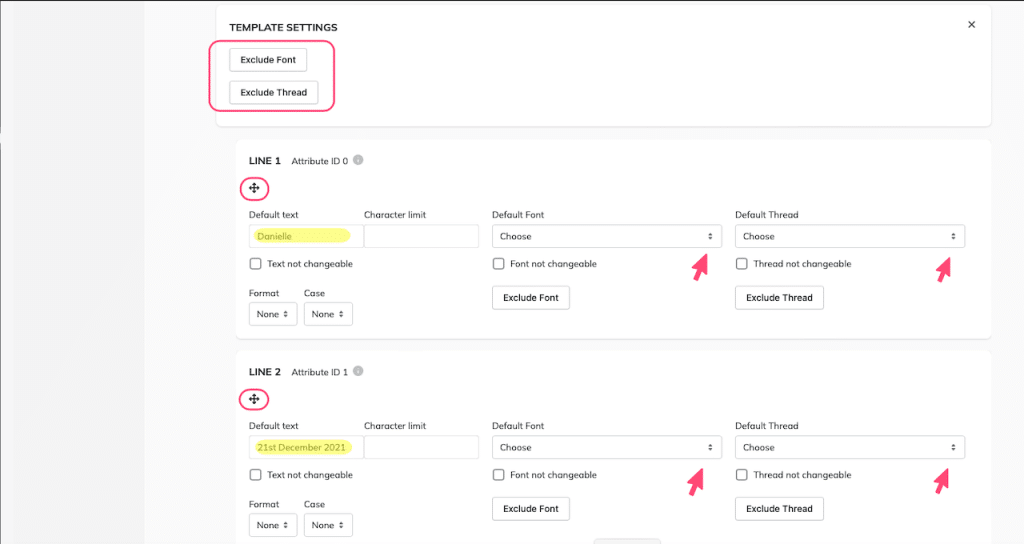
You can modify the default display text that will display for the EMB in the front end, as well as the default font and thread. You can also exclude font and thread choices on the front-end for the entire template or individual lines.
You can enforce character limits for each line (to avoid the user “breaking” the design where the name would be too long). For each line, you can also stop the user from changing the font or thread colour by checking the box of “…not changeable”