Logo Auto-Digitization
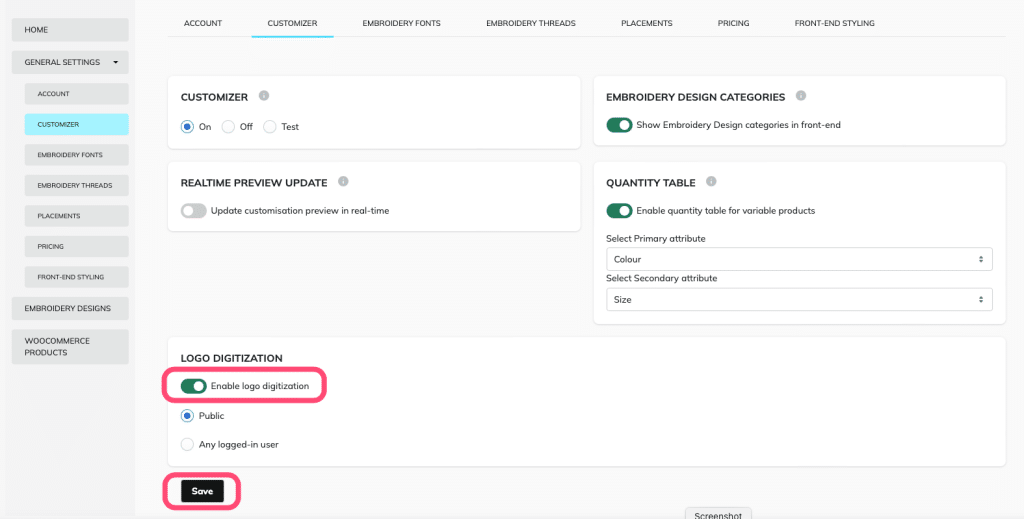
In the main menu: General Settings > “Customizer”
- Slide the toggle to “Enable Logo Digitization”
- Click “Save”
It Is possible to restrict logo digitization so it is only available for logged in users. Click the “Any logged in user” radio button to activate this.
Create an Embroidery Design with Logo Digitization
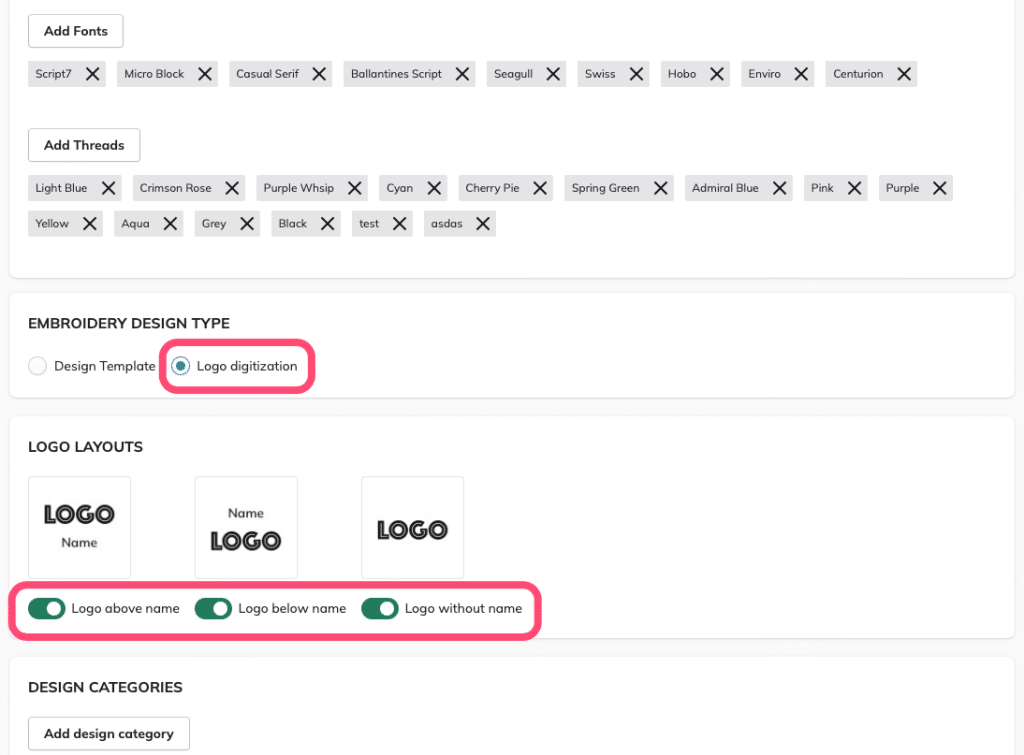
Go to “Embroidery Designs” > Add a New Design or Select an existing Design > click “Edit” > Scroll Down to:
- Embroidery Design Type > Select “Logo Digitization”
- Activate your preferred logo layouts
Assign Embroidery Designs to WooCommerce Products & Variations as Per Standard Templates
It is possible to set the customization placement for the entire category, notwithstanding the same image format/ subject matter is required (e.g. all t-shirts on a white background consistently photographed in an identical position). Alternatively it is possible to use a Placeholder image with a transparent center.
Set the Customization Placement Position
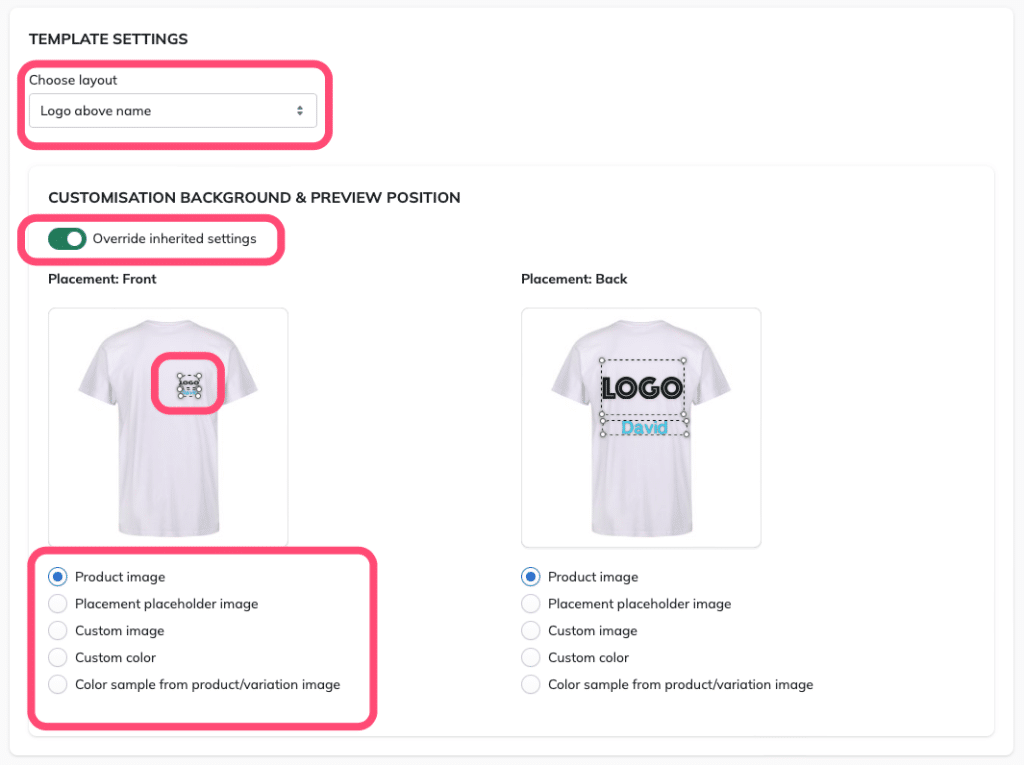
If required, it is possible to override the original customization placement set for a category and make granular adjustments to each product/ variation.
Set the Customization Background
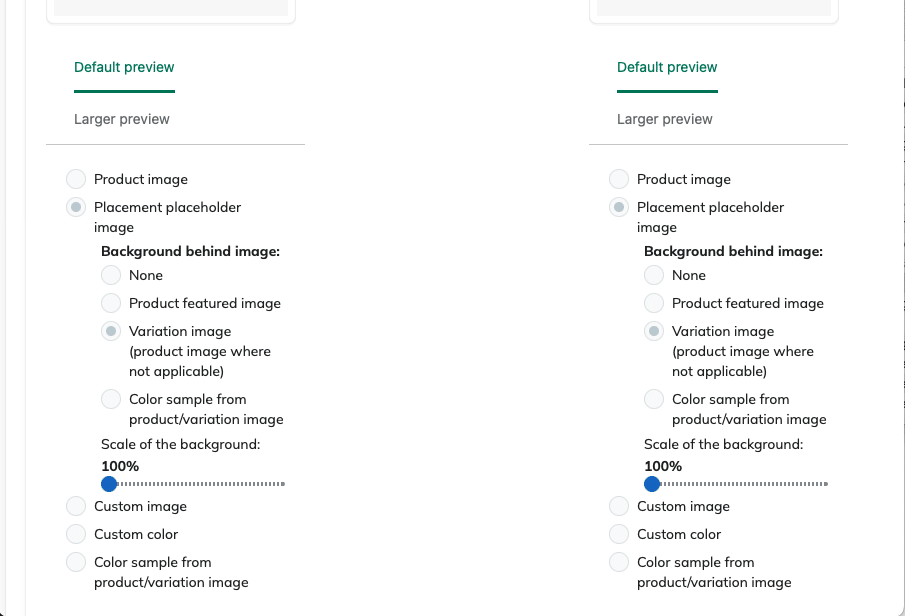
There are several options for the background of the preview:
- Product image
- Placement placeholder image
- Background behind image:
- None
- Product featured image
- Variation image (product image where not applicable)
- Color sample from product/variation image (the background can be scaled for patterns)
- Custom image (you can upload your preferred background image)
- Custom color (select a colour or use a Hex Code)
- Color sample from product / variation image
It is possible to create a Placement placeholder image (PNG) with a transparent center* to expose the product or variation image in the transparent center of the image. Alternatively it is also possible to colour sample from the product or variation image in the transparent center of the image. This is useful if your images are in inconsistent formats.
*you will need design software or need to ask a designer to create Placement Placeholder image with a transparent center
Auto Digitisation User Interface
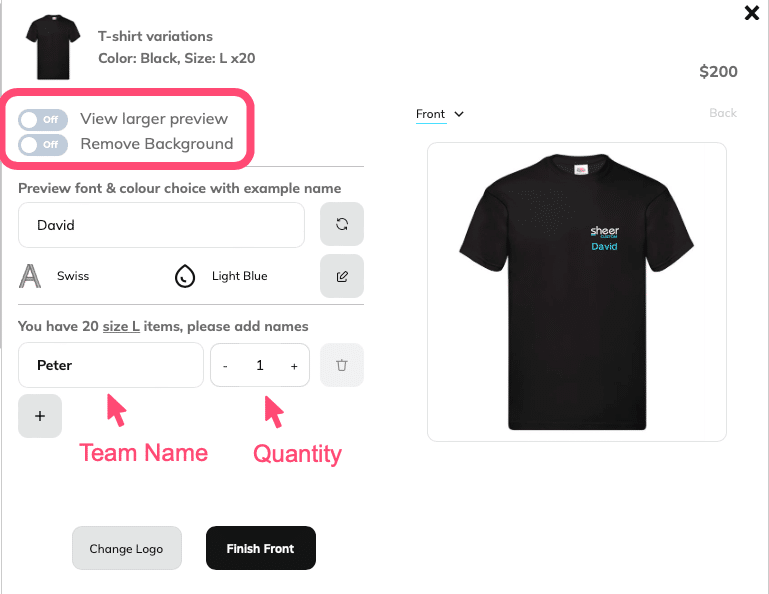
- Woocommerce Product Page > Select Product Size(s) and Quantity(s)
- Select “Upload your Logo”
- Choose design option (logo above, logo below, logo only)
- Choose placement (front, back etc)
- Click “Start Customising”
- Upload your logo file (SVG, EPS, JPEG, PNG)
- Click “Next”
Please note: SVG and EPS files usually produce better embroidery files. It may be necessary to adjust the emb output of JPEG and PNG sources in Wilcom Embroidery studio
- Add the name and quantity of sizes for each Team Member
- It is possible to adjust the sample name, font and thread colour (please note: the font and thread adjustment will be the final specification for the emb file outputs received in the WooCommerce order admin)
- Click “Digitize Logo” to see final embroidery preview
Use the “Larger Preview” switch to see a close-up of the embroidery stitching on a colour sampled background for contrast. It may be necessary to re-upload and digitize a source file when there is a background issue. In this case use the “Remove Background” switch prior to digitization
- If more than 1 placement option exists (e.g. front, back, sleeve) there is an option to create the same or a different customization for each additional placement
- When the customizations are complete it is possible to add comments. The final step is to “Buy” and progress to the checkout
Auto Digitisation Order Admin
Customization orders email confirmations to the store owner and customer include a preview of the customization for proofing purposes. Store owners can process the embroidery customisation in the order admin as follows:
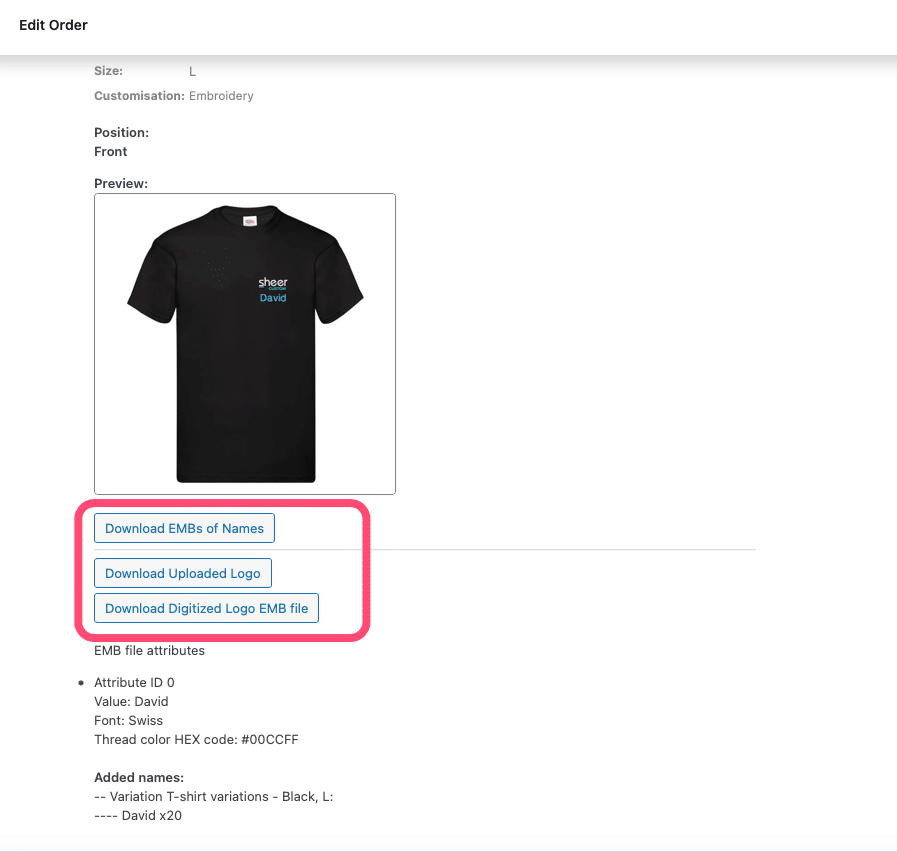
- Woocommerce > Orders > Click relevant Order
- Scroll down to see the Customization preview image
- Click “Download EMB’s of Names”
- Click “Download Digitized Logo EMB file”
It is necessary to combine name emb’s with the logo emb in Wilcom Embroidery Studio in order to prepare for production. New featurecombining names and logos coming soon!