Assign Embroidery Designs to WooCommerce Products & Variations
Select the product or variation and set the inherited category default
Instead of setting designs for categories you may wish to assign designs on an individual product basis, or refine the category settings for a specific product or variation i.e. to ensure template defaults match certain colours or use different fonts or wording for specific products or variations
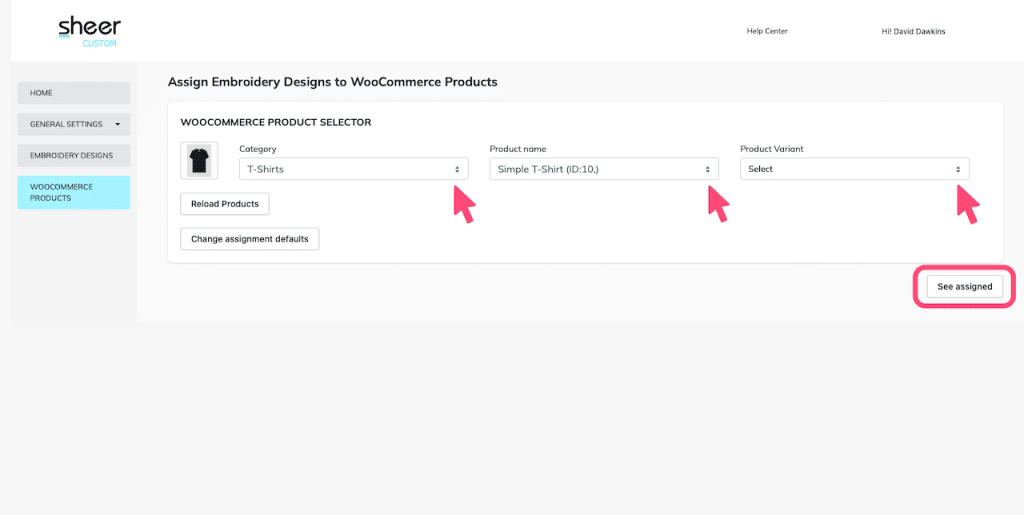
Start this as follows:
- From the dropdown select the WooCommerce category name
- In the second dropdown select the product
- [Optional] In the third dropdown select the variation (ie. if you want to modify the settings for a specific variation instead of the entire product)
- Then click “See Assigned”
If the product already has Embroidery Design’s assigned (via category assignment) you will see a box with a notice that says “Please select which category this product should inherit settings from as a default:” By default the category selected will be the first category that you assigned designs that this product belonged to. You can change the default to any of the categories as follows:
- Select the category radio button
- Click “Save“
Please note: the DEFAULT inherited category is relevant only if the website visitor has navigated directly to the product URL (from Google for example) – then the Customizer will display the selected DEFAULT set of embroidery designs for the product. If the website visitor has instead navigated to the product via a category they will see the relevant category settings where these have been set.
Assign Product Specific Designs
It is possible to assign additional designs to those inherited from category assignments or to set up a completely bespoke set of designs for a product.
To add to the inherited designs make sure the radio button for the default category you wish to add designs to is selected. To add a completely bespoke set of designs for the product make sure the “None” radio button is selected.
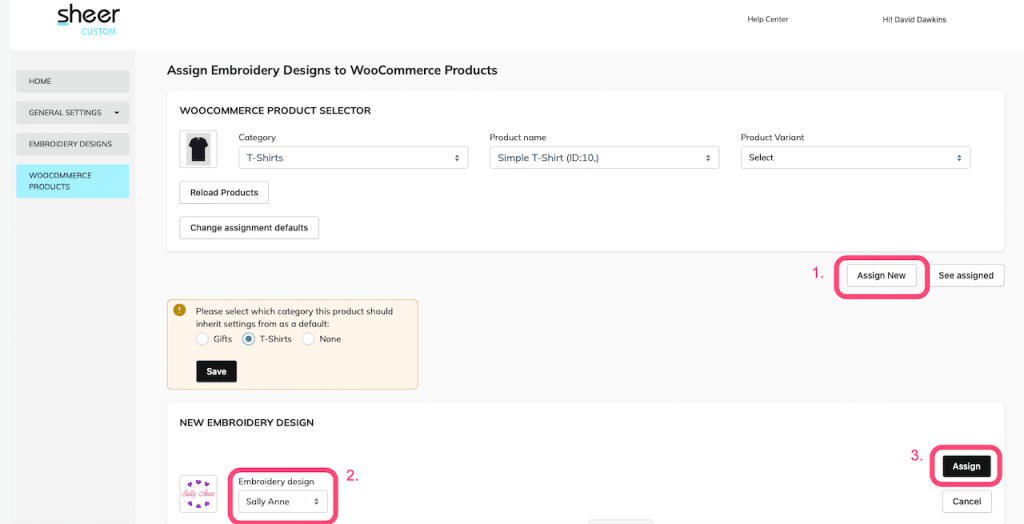
Then proceed as follows:
- Click “Assign New”
- Then select the Embroidery Design
- Next click “Assign”
You can also hide inherited designs with the “Hide” switch
Please note: Category assignments are overridden completely when using “None” and assigning bespoke designs to products. In the Customizer this means the same set of designs will be visible for the product regardless of how the website visitor navigated to the product
Refining the Design Settings for a Product or Variation
You can edit the design settings inherited from a category for a specific product or variation by clicking “Edit Settings” and then modifying the settings using the “Override” switches
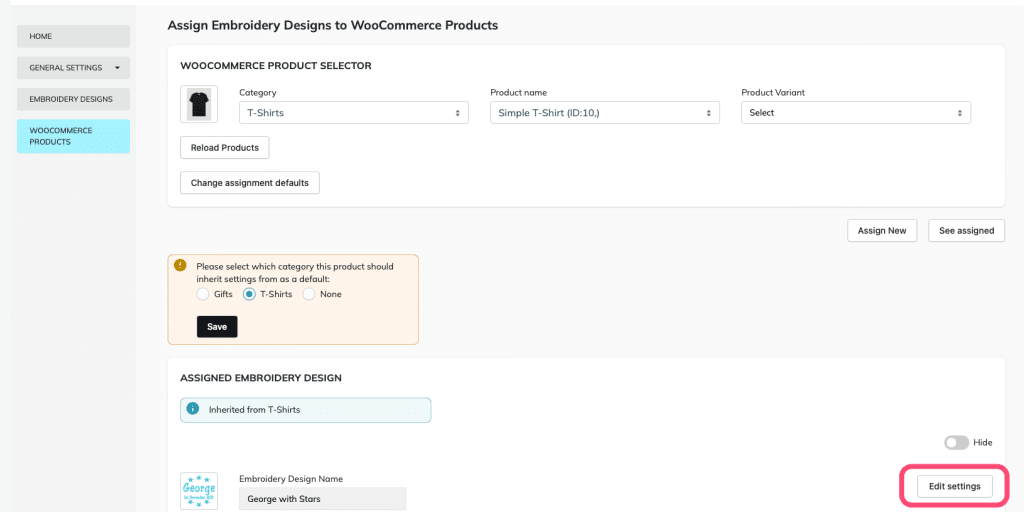
Fonts, Threads, Pricing and Template Attributes (such as the displayed default text or colours) can all be overridden.
Don’t forget to click “Save Changes” when you’re done.
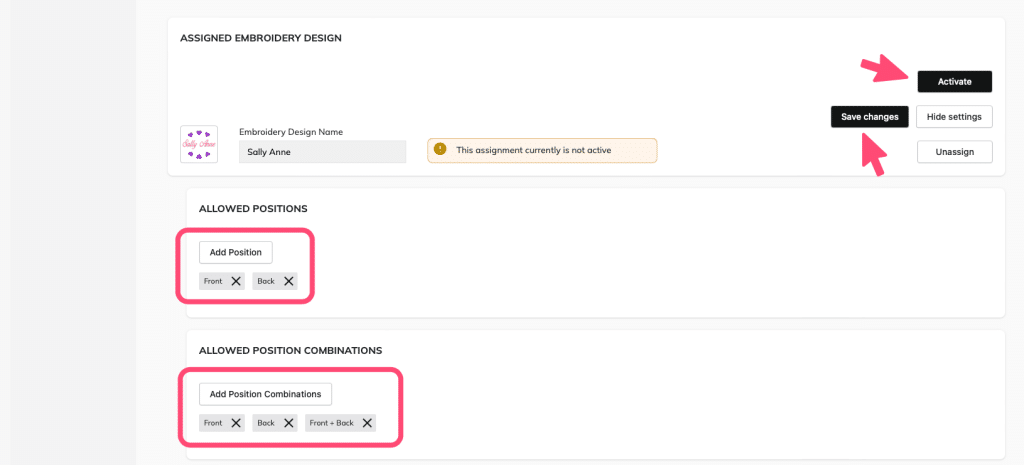
You can also edit Allowed Placement Positions for each Product or Variation from the dropdown
The Customization Background & Preview Position for each Product or Variation can also be edited
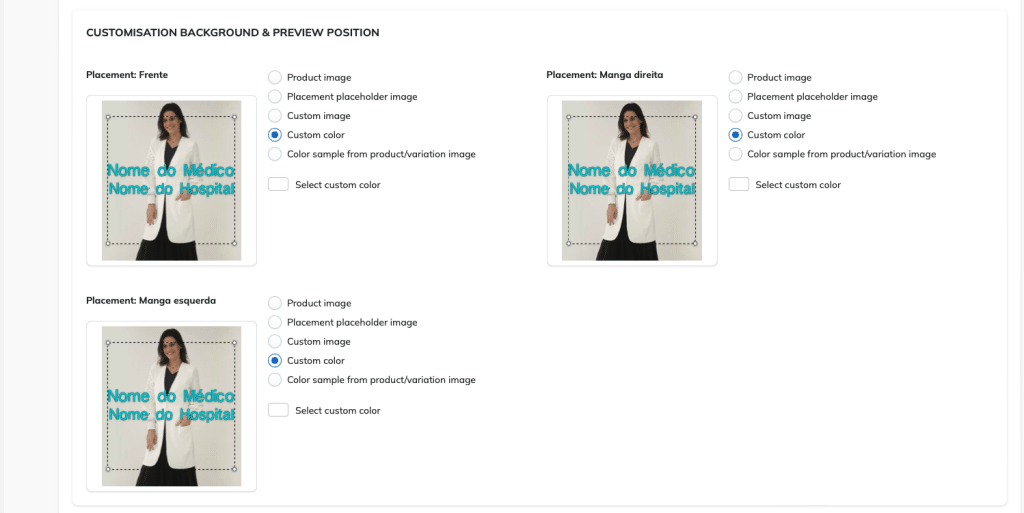
There are several options for the background of the preview:
- Product Image (default)
- A custom image (you can upload your preferred background image)
- Custom Colour (select a colour or use a Hex Code)
- Color sample from product/variation image (this samples the dominant colour of the product image and uses it as a background for contrast with the embroidery)
Adjust the size and position of the embroidery on the background by first moving, then clicking and resizing the corner of the dotted-line box. The position will be the same on all products in the category.
Click “Save Changes“
Then Click “Activate“